Over the last few years, there has been a shift and more of an emphasis on optimising your website.
No doubt if you have ever looked into your on-page SEO then you have come across the message that your ‘website images need optimising‘ when checking your page in one of the many page speed tools.
Having optimised images with low file sizes is definitely an important factor. It can limit how well your website performs, especially when it comes to website load times.
It’s not the only factor and it’s not a magic bullet which will supercharge your website speed simply because you have halved the image size. NO.
But, when it comes to website bloat, images are usually one of the biggest contributors.
The problem is, you most likely don’t have the time to learn or master programs like photoshop or one the many image tools available to address the issue.
Even then you’ll find that the image sizes the program’s output are still too big!
Well in this post we are going to give you a crash course on how your website can have near-perfect optimised images with low file sizes.
Which image optimisation option to use?
We are going to cover the 2 ways in which you can optimise your images for reduced file sizes.
First, using automated image optimisation plugins. These can automatically optimise images on the fly for those who have a WordPress site. No doubt you already have a ton of images uploaded which are being used on your site.
If that’s the case, then downloading them and manually optimising them is probably not an option.
An image optimisation plugin can often help you if that’s the case.
But although automated image optimisation plugins are an easy option for you to use. They are not always the best option to take.

Why? Well, when you factor in that many of the plugins work using credits and/or monthly subscriptions it can cost you a shed load of cash 🤑.
Secondly, and frankly, our preferred option is manually optimising images. We use online tools to optimise, reduce and compress the file sizes.
If you’re not using WordPress or a CMS that has image optimisation plugins then you will have to manually optimise your images.
Yes. It will take you time but when you factor in how much money you can save it’s really a no brainer.
We have and always will love the ‘free options’ that are available. Whether that’s to optimise images OR any other type of on-page rochdale SEO task we may be undertaking.

Plus, once you learn the best practices of optimising and compressing your images before you upload them to your site it should become second nature to you.
It can literally take you only 30 seconds to optimise 1 image if that. Did we mention that the second option of optimising images is for free? 😁
So, let’s get cracking.
Quick image optimisation test criteria
We are going to use the same image for all our tests. Our goal is not to lose out on quality but at the same time to ensure we have the lowest possible file size. To strike the perfect balance.
To ensure we replicate a real-life situation we will use 2 JPEG images. 1 which is in a banner format and another which is a photograph from a digital camera.
Our test banner image

Banner-image.jpg, dimensions: 1024 x 337 pixels, weight: 125k
Our test digital photo image

Furniture-image.jpg, dimensions: 4032 x 2688 pixels, weight: 8.7MB
Why these types? Well as an SEO agency we often find that our clients use digital camera photos on their website which we find during an SEO audit.
Banners are often used on a home page to promote products and services. For banners, they may end up using visual content tools like Canva etc. to create visually stunning images.
Using either of these ways inevitably ends up with an image having a large file size.
Other criteria on our list are:
- Our preference is lossy compression. Which can often achieve a 50-70% reduction in file size.
- It must be a working tool, plugin or otherwise. If it fails then it’s off the list!
- Browser only tools. So, we can drag and drop the image either into a plugin or online tool.
- No desktop software to be used before or after our test.
The best plugin image optimiser utilities
For the image optimisation plugin test, we will be using a default WordPress set up. On the latest WP version (v5.3 as of writing) with the twenty-twenty theme. No default WordPress settings will be changed for this test.
In the latest version of WordPress, it will scale large images when you upload them.
The full-size image when rescaled by your WordPress responsive website gets renamed and saved as [image-name]-scaled.jpg. This leaves the original full image untouched.
So, our digital photo image will automatically get scaled when we upload it.
We will stick with that as it represents how a real-world user would use WordPress. That means no function filters to stop scaling images will be applied and no media settings will be changed.
Our new scaled JPEG image has dimensions of 2560x1707px with a file size of 925KB, which just for an upload is pretty good.
Don’t worry, that new scaled image should be good to use for the majority of uses and there is no clear loss of quality.
The only settings which we will change are within the plugins we test. If the settings tick our criteria and are available, we will use the option.
Lossy mode provides an ideal optimization of your images without significant quality loss. The file size will be reduced approximately 5 times with a slight decrease in image quality. In most cases that cannot be seen with the naked eye.
So, if a plugin has the lossy option available, we will select that otherwise, we’ll stick with the defaults.
Image Optimisation Plugins
Let’s begin. For those of you who use WordPress and have tons of images already in use and uploaded we compared all the available image plugins.
Our results found that the best 3 are:
No1. Short Pixel Optimizer View Plugin
The plugin requires you to sign up and add in your email to request a free API key before you can begin to optimise your images.
Once that’s done you can start to use the image optimisation features.
It has the lossy compression type set as default so that one big plus for this plugin. No fiddling about with settings etc. so it can work out of the box so to speak.
The results of the image optimisation on our 2 images are:
| Image | Original Size | Original Size Reduction | Scaled Image Size | After Optimisation | % Saving | Compression |
|---|---|---|---|---|---|---|
| Banner | 125KB | N/A | N/A | 61KB | 39.79% | lossy |
| Photo | 8.7MB | N/A | 925KB | 336KB | 63.68% | lossy |
The original digital photo file was left untouched. Only the scaled JPEG images and variations WordPress created were optimised.
This plugin optimised the images to their lowest sizes including the scaled image. For that reason, it hit the no1 spot.
No2. Webcraftic Robin image optimizer View Plugin

The plugin has a lossy option so we enabled that and kept all other default options intact. We then uploaded both images and hit the optimise button. Here are the results we got using this plugin:
| Image | Original Size | Original Size Reduction | Scaled Image Size | After Optimisation | % Saving | Compression |
|---|---|---|---|---|---|---|
| Banner | 125KB | N/A | N/A | 50KB | 60% | lossy |
| Photo | 8.7MB | N/A | 925KB | 825KB | 10.81% | lossy |
Again, the original image remains untouched and was not optimised by the plugin.
The scaled image, however, was optimised. The other WordPress generated images (the thumbnail, small, medium, large) remain unoptimised.
It seems like the plugin skipped these with the default settings applied.
Going back to the settings there is an option to select those different image sizes. If selected it does optimise them but it doesn’t show the stats and savings gained when you run the plugin on an image.
Only on manual inspection of the files via FTP could we see that the JPEG file sizes were optimised and had a reduced file size.
This plugin came in second as its really easy to use. It has the lossy option and with the right setting ticked will also optimise the WP generated images.
It however missed out by not being able to display the full savings for all images. It also didn’t reduce and optimise the file size of the digital photo as much as Short Pixel did.
No3. EWWW Image optimiser View Plugin
A quick and easy plugin to install and activate. It doesn’t require signing up to a service so that was a bonus.
We found that it has one of the most advanced settings options compared to the other plugins we tested.
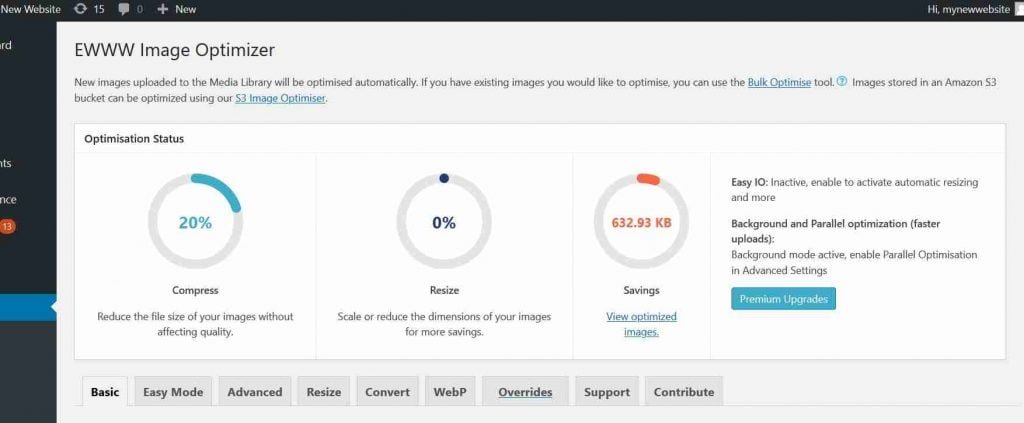
Going through the options we noticed that you can set it to also optimise the original image! Great, none of the other plugins offered this as a setting OR included it as default so that’s a plus.
Our image optimisation results using this plugin were as follows:
| Image | Original Size | Original Size Reduction | Scaled Image Size | After Optimisation | % Saving | Compression |
|---|---|---|---|---|---|---|
| Banner | 125KB | N/A | N/A | 118.2KB | 5.7% | lossless |
| Photo | 8.7MB | 8.2MB / 5.6% Change | 925KB | 883KB | 4.54% | lossless |
Overall, it’s a very easy to use plugin. It doesn’t need any changes to the default settings apart from selecting to optimise the original image.
EWWW came in 3rd mainly due to ease of use and not having to sign up for an account.
It came ahead of the Kraken plugin (more below) due to it being able to optimise the original image. None of the other plugins managed to do this correctly for one reason or another.
It was close though between EWWW and Kraken.
The ones that didn’t make it…
We looked at and tested various plugins for image optimisation. Here is a list of the ones that just didn’t cut it for a variety of reasons.
Kraken Image Optimisation Tool
This looked like a cracking plugin to use. You do have to sign up for an API before using it. Once you have done that it’s straight forward to use.
It has all the options that we desired. It has the lossy option set as default, original image optimisation etc.
Initially, we didn’t change any settings. But when we uploaded our digital photo the plugin seemed to intervene between the WordPress default process of creating a scaled image with reduced size.
As such the scaled JPEG image size was a whopping 8.73MB and on optimisation, it reduced by over 50% to 4.23MB. Considering all the other plugins optimised the scaled image to less than 1MB this was a disappointing result.
Also, we were expecting it to optimise the original and not the scaled image the way it did.
We restarted the test with the auto optimise image on upload option turned off in the plugin’s settings. We let WP scale and compress the digital photo as it normally would.
Once we did that here are the results we got:
| Image | Original Size | Original Size Reduction | Scaled Image Size | After Optimisation | % Saving | Compression |
|---|---|---|---|---|---|---|
| Banner | 125KB | N/A | N/A | 70KB | 38.86% | lossy |
| Photo | 8.7MB | N/A | 925KB | 883KB | 4.54% | lossy |
The banner image was optimised to the third smallest file size available during our test. But the digital photo was nowhere near as small as the other plugins were able to achieve.
The second set of results are still better than the first try we had with this plugin. Yet it still lacked behind the plugins in our top 3 list.
For that reason, it lost out in being in one of the top 3.
WP Smush
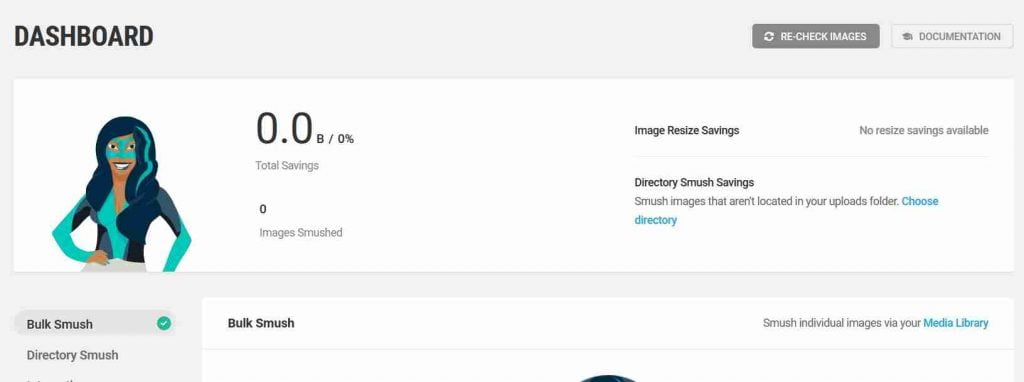
With this plugin, we didn’t change any of the plugin’s settings. TBH none of them would have made a difference. The lossy compression is only available in the pro version as is the option to optimise the original image.
The original and the scaled image provided by WordPress are both left untouched.
This was a very confusing plugin to use and we couldn’t make sense of the results. Its not very clear which images are being optimised and if they are by how much.
For that reason, we wouldn’t recommend using this plugin.
Resmush.it
This optimisation plugin only has very basic options. We decided to change the ‘optimize on upload’ setting to off so we could manually optimise images.
Apart from that, there are no other options to choose from. The results were very disappointing:
Banner & digital photo image – Result: reSmush.it status – Reduced by 0 (0 saved)
Nothing happened! No savings at all.
The plugin didn’t do anything to the existing scaled image. No savings at all.
Pretty disappointing plugin to say the least. Not only did it not optimise the scaled OR original image but it created multiple duplicate images (with little or no size reduction). This contributed to overall disc space taken by the site in the hosting account.
Even after deleting the original images via the WP media section it still left the scaled images it had created.
They were not visible via the WP media section. Only viewable via FTP which we then had to delete manually. Very bad.
Image optimisation service by Optimole
Yet again another plugin that wants your email and personal info to get an API before you can start optimising. Once we signed up and added in the API key we received, it was all good to go.
The only setting we changed was the image quality setting. Although this option is only available with the ‘Enable image replacement’ option enabled. Why? We don’t know is the answer!
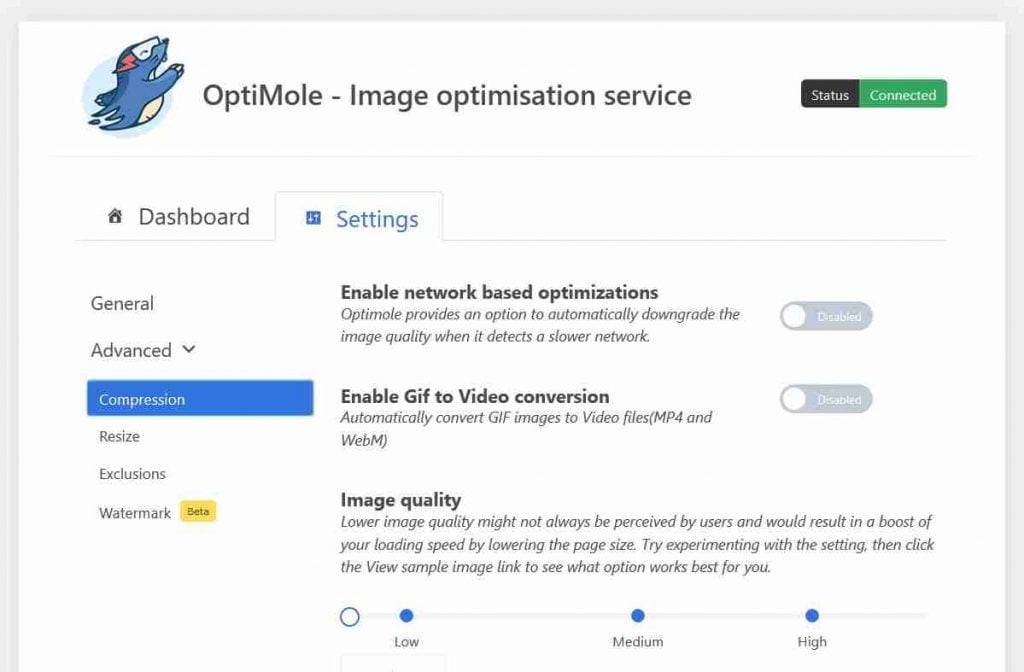
We left all the other options as default.
When we added our test images to the media section unlike other plugins, we didn’t get any optimisation options. Images simply uploaded and that’s it.
Dumfounded we went to the plugin’s dashboard hoping to see something happen. Instead, we found there was an optimised image that didn’t even exist on our installation. WTF! 😱
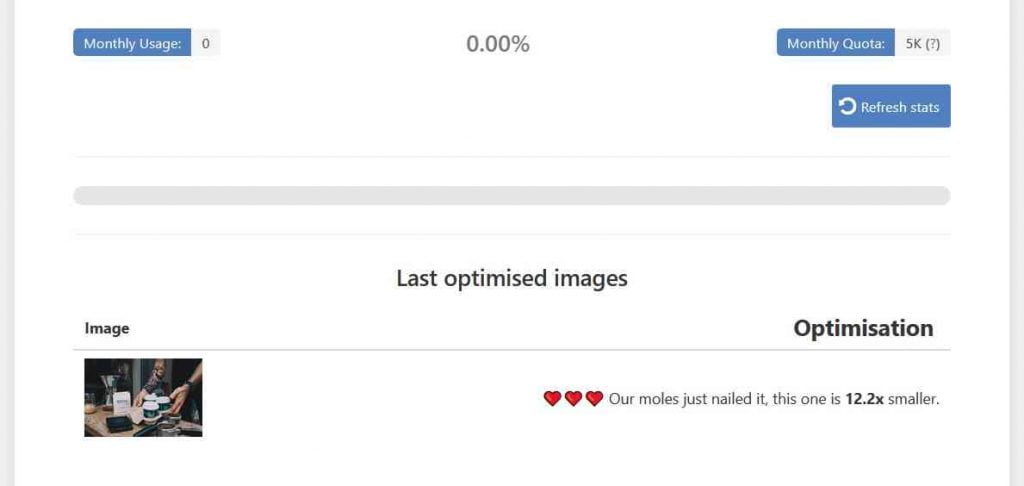
This plugin from our test does pretty much diddly squat.
TinyPNG – Compress JPEG & PNG images
We had high hopes for this one as we use the online browser version pretty regularly. It has some good reviews and seems like it could have been up to the job.
Sadly, even though we signed up and popped in our email no API key or account details were received. This meant we couldn’t use it.
Big disappointment but we do expect a load of spam emails pretty soon 🤦
Imagify Image Optimisation Tool
Another plugin we had high hopes for after reading the many raving (sponsored/affiliate?) reviews.
As with some of the other plugins, you are required to sign up (so they can spam you?!) before you can use it. Once we had signed up and entered the API key, they have an easy to use settings page:
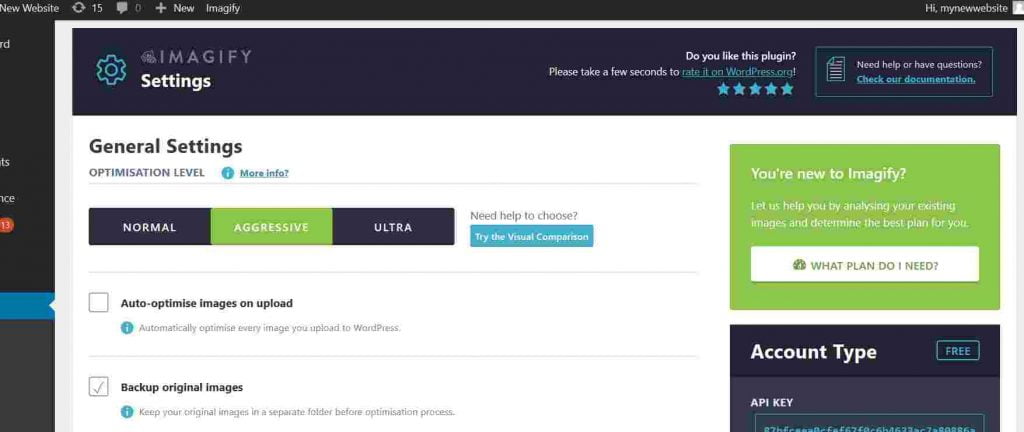
The optimisation options look pretty neat too. The optimisation level and visual comparison tool built-in looks very promising 😋. Something we haven’t seen before.
The ultra-setting is what we opted for based on the results from the visual view:
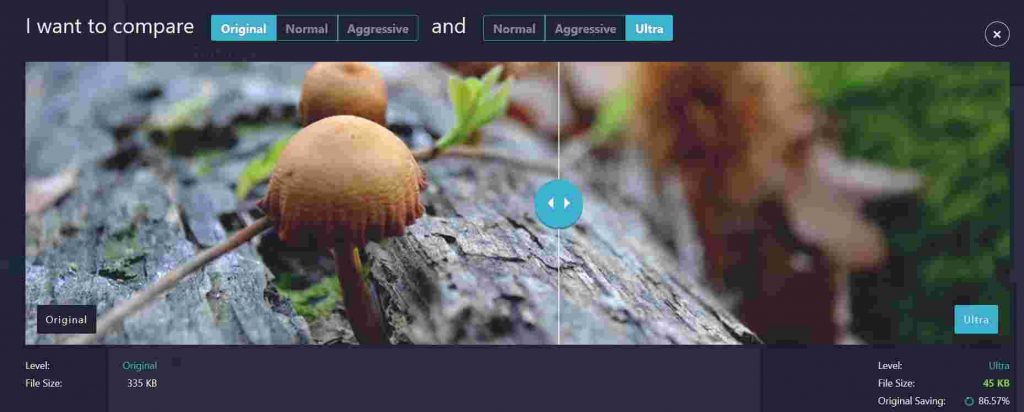
Sadly, we were not able to use the plugin.
As we are using a test site that’s not on an SSL (I know right!) the plugin returned this error:
Our server returned an error (0 – Chunky upload is not supported by HTTP 1.0).
Damn! It should work either way we think. After all many sites have still yet to implement an SSL on their site for a variety of reasons.
🏆 The best image optimisation plugin for WordPress is…
There you have it, the winner for us is Short Pixel. It’s the best solution if you have loads of images to optimise or you are just downright lazy to go down the manual route!
Before we move on here is the table with all the data in it. You can choose if you want to make your own choice (which you should).
| Plugin | Image | Original Size | Original Size Reduction | Scaled Size | After Optimisation | % Saving | Compression |
|---|---|---|---|---|---|---|---|
| Short Pixel | Banner | 125KB | N/A | N/A | 61KB | 39.79% | lossy |
| Short Pixel | Photo | 8.7MB | N/A | 925KB | 336KB | 63.68% | lossy |
| Webcraftic | Banner | 125KB | N/A | N/A | 50KB | 60% | lossy |
| Webcraftic | Photo | 8.7MB | N/A | 925KB | 825KB | 10.81% | lossy |
| EWWW | Banner | 125KB | N/A | N/A | 118.2KB | 5.7% | lossless |
| EWWW | Photo | 8.7MB | 8.2MB / 5.6% Change | 925KB | 883KB | 4.54% | lossless |
| Kraken | Banner | 125KB | N/A | N/A | 70KB | 38.86% | lossy |
| Kraken | Photo | 8.7MB | 8.2MB / 5.6% Change | 925KB | 883KB | 4.54% | lossy |
The best web-based optimisation utilities
As stated before our go-to and recommended way of optimising images is the manual way. Sure, it takes time but it gives you full control over the image quality.
Web-based image optimisation tools can help to reduce image file sizes without losing the overall quality of an image.
As each image is different the human eye is the best judge of how much an image can and should be optimised. Unlike automated tools which are over-cautious and too conservative, you don’t often get the best results possible.
When we uploaded our test images with WordPress it created a scaled image of our full-size image.
To ensure our test results are consistent we download the scaled image WordPress created to use with our manual tests.

Furniture-image-scaled.jpg, dimensions: 2560 x 1707 pixels, weight: 925KB
That now gives us 3 images to optimise manually with web-based optimisation tools. The original banner image, the original digital photo image and the scaled digital photo image.
Our test results found that the 3 top web-based image optimisation utilities are:
No1. DynamicDrive’s Online Image optimizer – Visit
A very easy to use image optimisation tool.
You simply upload your image and it will spit out the different optimised image variations based in 10Q (image quality) increments.
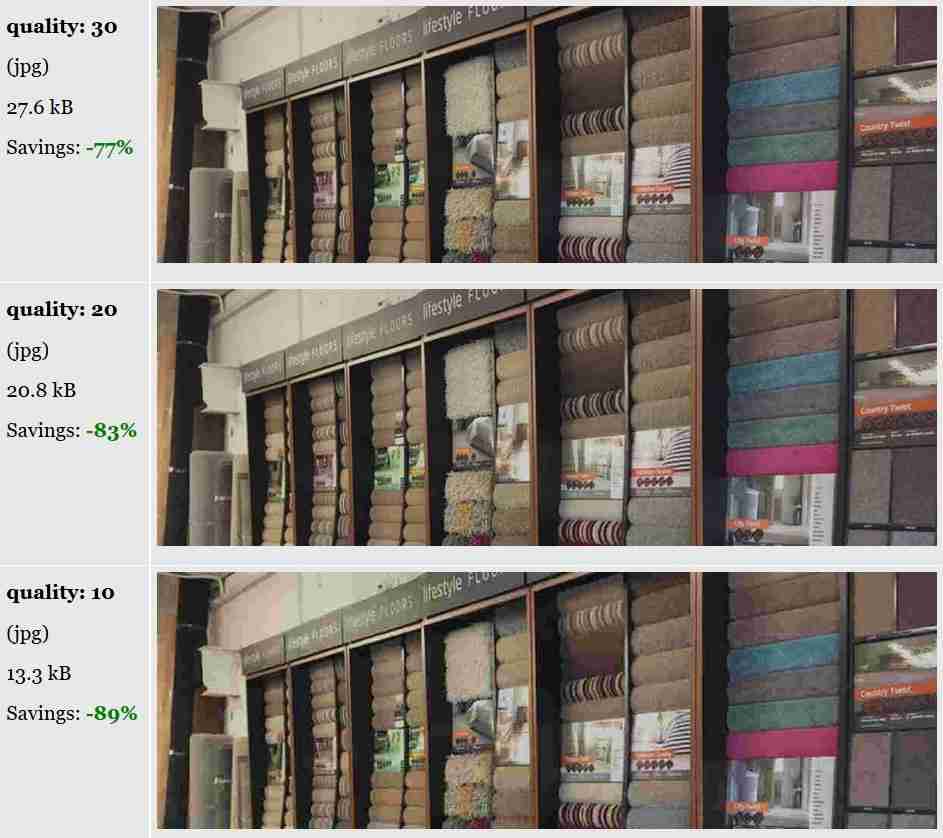
We 💖 this online tool. There are no settings to play with, nothing to adjust. It’s simple and just works.
The visual selection that it shows for all the different optimised image variations allow you to easily compare the best image for you to use.
The lowest file size that it gave for our banner image was 13.3KB at an image quality of 10Q. That, however, had some degradation which was noticeable to the human eye.
The image quality at 20Q was the best. It had no noticeable degradation visible to the human eye and had a file size of 20.8KB which was a whopping 83% saving on the original size. Perfect to use on a website.
Moving on to the original digital photo, we were unable to test it.
DynamicDrive’s online tool only allows you to upload images to a max size of 2.86MB. Our digital JPEG photo was way over that limit to test.
But we also had a scaled image of the digital photo which was well within that limit so we tested that.
Like our banner test the tool gave a visual comparison of all the different optimised images in increments of 10Q for us to choose from.
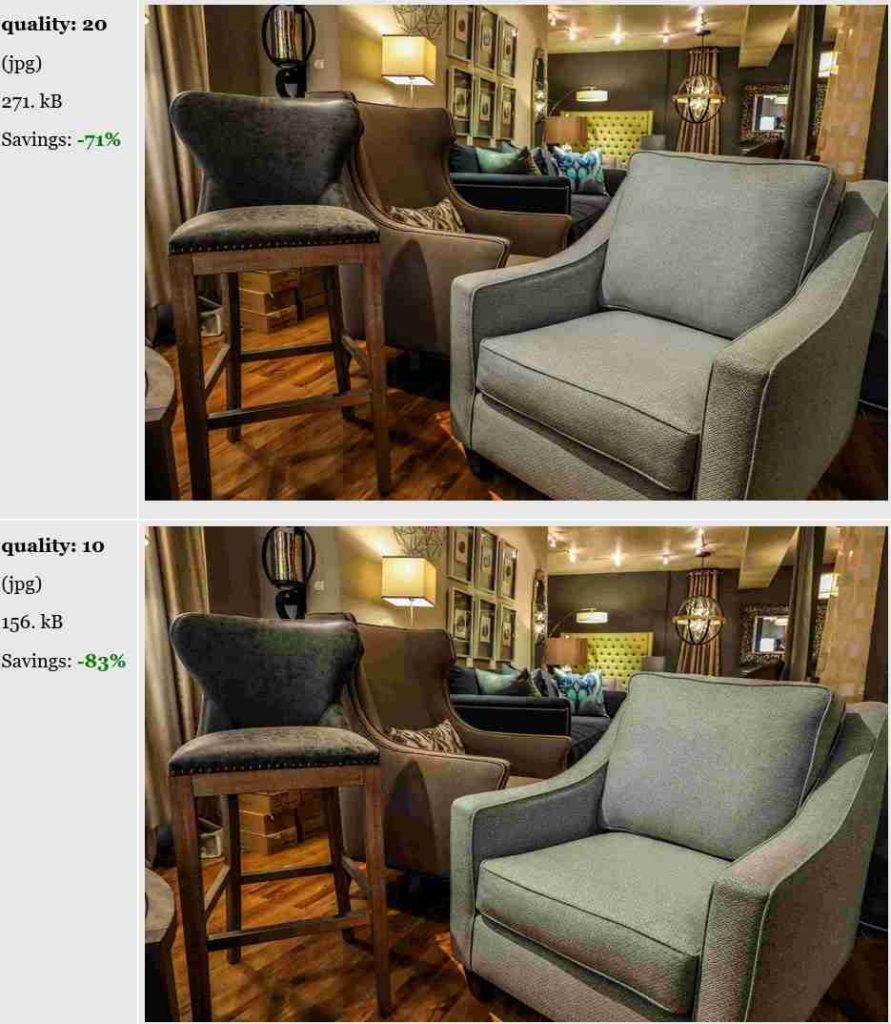
Again, the lowest image quality of 10Q had some degradation which was noticeable to the eye. It contained more red than we liked so we ruled it out.
The image optimised to a quality of 20Q was more than suitable. The file size was 271KB which is a saving of over 71%.
| Image | Original Size | Original Size Reduction | Scaled Image Size | After Optimisation | % Saving | Compression |
|---|---|---|---|---|---|---|
| Banner | 125KB | N/A | N/A | 20.8KB | 83% | lossy |
| Photo | 8.7MB | N/A | 925KB | 271KB | 71% | lossy |
A clear winner even when comparing it to the WordPress plugins we tested.
This online optimisation tool generated smaller fie sizes for both our test images.
It’s only a shame that we couldn’t test our original 8.7MB JPEG image.
No2. Optimizilla online image optimisation tool – Visit
The tool is easy to use. It uses the lossy method to optimise both JPEG and PNG images and you can upload 20 images at one time.
When you upload an image, the tool will automatically choose a default quality level.
After which you can select the quality of the image required. It ranges from 100Q all the way down to 10Q.
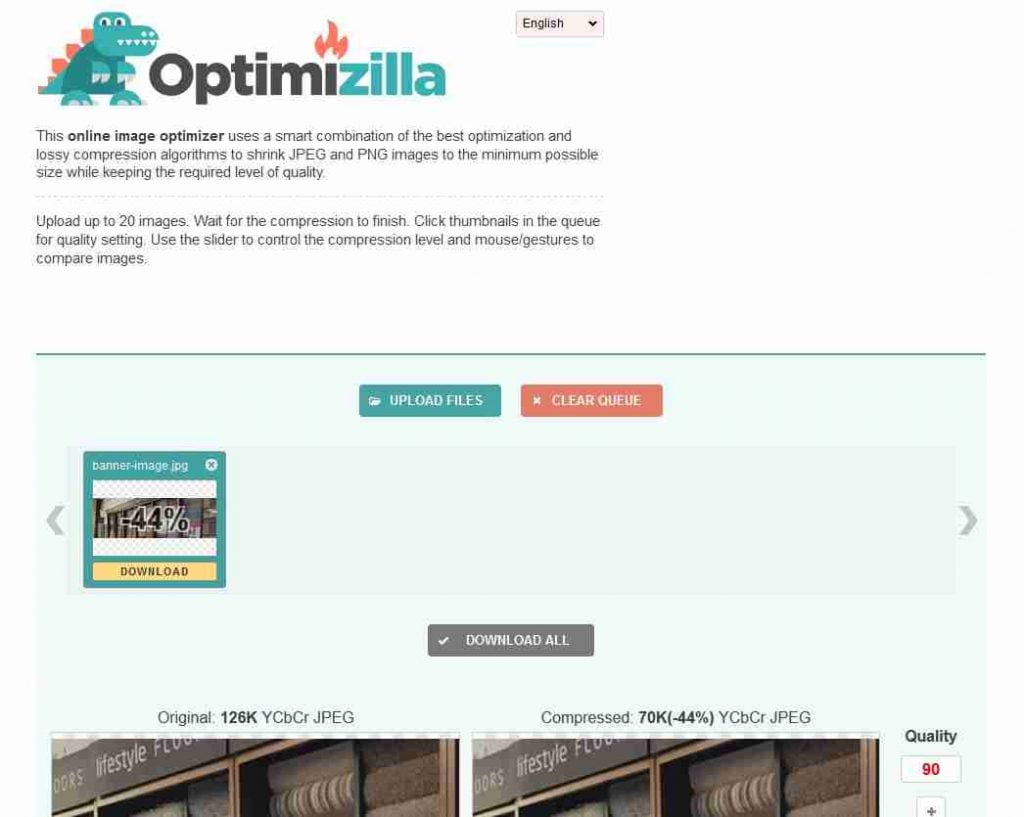
There is no comparison available so you do have to manually fiddle around with the quality setting to get the best possible image output.
We pushed the quality all the way down to 10Q for our banner image but the degradation was pretty noticeable.
Although the optimised file size was now 7.7K it just wasn’t suitable to use.
After fiddling around a little we found that optimising the image to a level of 30Q was the best achievable. It resulted in a JPEG file size of 18K which is an 86% saving.
This online tool doesn’t have an upload size limit so we could test both our original and scaled photo images.
When we uploaded our original digital photo image the default output level the tool gave was 87Q.
This resulted in an optimised image file size of 2.5MB, a saving of 71%. Pretty respectable.
We pushed the image quality setting all the way down to 30Q which gave us our best result. The new optimised image was now 662K which is a massive 91% saving!
On the scaled JPEG image, the default output quality the tool set was 80Q resulting in a 769K image size. That’s a saving of just 20%.
Manually adjusting the quality setting to 30Q (until we were happy) we were able to get a JPEG file size of 265K, a saving of 73%.
| Image | Original Size | Original Size Reduction | Scaled Image Size | After Optimisation | % Saving | Compression |
|---|---|---|---|---|---|---|
| Banner | 125KB | N/A | N/A | 18KB | 86% | lossy |
| Photo | 8.7MB | 662KB | 925KB | 256KB | 73% | lossy |
What we didn’t like about Optimizilla was that it doesn’t provide you with all the image variations to compare.
It also requires you to fiddle about with the quality settings to get the best results. Not ideal.
The ones that didn’t make it…
We tested quite a few online image tools but for one reason or another, they simply didn’t cut it.
Here is a list of the ones we tested:
1. TinyPNG
We have used this image tool a lot before. It provides a very easy to use interface to upload your images.
You simply drag and drop your images and let it do the work.

You can also optimise up to 20 images at a time and it has a respectable 5MB limit. Although it’s a much smaller limit to be able to test our original JPEG image file.
Sadly, compared to our top 2 the results were disappointing, to say the least!
| Image | Original Size | Original Size Reduction | Scaled Image Size | After Optimisation | % Saving | Compression |
|---|---|---|---|---|---|---|
| Banner | 125KB | N/A | N/A | 113.5KB | 12% | lossy |
| Photo | 8.7MB | N/A | 925KB | 680.4KB | 31% | lossy |
We have since stopped using TinyPNG and now use our no1 manual tool DynamicDrive.
2. WebResize Image optimisation
Another tool we have used in the past before we started to use TinyPNG.
Sadly, this tool resizes the image for you automatically (it is called Webrezise after all!) when you upload an image.

We didn’t want that. We wanted an optimised image with the same dimensions. Yes, you can change the size via the options but it’s just a little too much fiddling for our liking.
3. Compressor.io
Yet another online tool we have used in the past. We would often used it in conjunction with TinyPNG to see which one gave us the best results.
You simply drag and drop the image and let the tool do its thing.

You can choose from the lossy or lossless option and it has a decent 10MB upload limit.
The results from our tests, however, tell another story.
| Image | Original Size | Original Size Reduction | Scaled Image Size | After Optimisation | % Saving | Compression |
|---|---|---|---|---|---|---|
| Banner | 125KB | N/A | N/A | 59.57KB | 54% | lossy |
| Photo | 8.7MB | 2.29MB | 925KB | 964.62KB | ? | lossy |
4. Kraken.io
Yup, it’s the same service as the plugin we tested earlier but in a web interface.
It doesn’t need you to signup, you simply drag and drop the files you want to optimise in place.
You can also upload from Google Drive, Dropbox and Box which we found super useful 👍.
Plus, it has the lossy or lossless options and a resize image feature which we liked as well. The downside is that it has a 1MB file limit which ruled out testing our original photo image.
Results-wise, it was pretty disappointing. It gave an average saving of just 11% and the optimised file sizes were not as small as we hoped for.
| Image | Original Size | Original Size Reduction | Scaled Image Size | After Optimisation | % Saving | Compression |
|---|---|---|---|---|---|---|
| Banner | 125KB | N/A | N/A | 76.71KB | 38.36% | lossy |
| Photo | 8.7MB | N/A | 925KB | 888.86KB | 7.95% | lossy |
There you have it. Without a doubt, DynamicDrive’s online image optimisation tool outperforms all the other web-based tools we tested.
It gave us a visual view of all the images so we could compare and choose from. And it doesn’t need you to select any options.
When trying to optimise images it’s definitely the quickest and easiest to use. The only downside is that you will have to optimise one image at a time.
Here is the optimisation data from all the tests we ran manually. You can select which tool you prefer to use (hint: use DynamicDrive!)
| Tool | Image | Original Size | Original Size Reduction | Scaled Size | After Optimisation | % Saving | Compression |
|---|---|---|---|---|---|---|---|
| DynamicDrive | Banner | 125KB | N/A | N/A | 20.8KB | 83% | lossy |
| DynamicDrive | Photo | 8.7MB | N/A | 925KB | 271KB | 71% | lossy |
| Optimizilla | Banner | 125KB | N/A | N/A | 18KB | 86% | lossy |
| Optimizilla | Photo | 8.7MB | N/A | 925KB | 256KB | 73% | lossy |
| TinyPNG | Banner | 113.5KB | N/A | N/A | 118.2KB | 12% | lossless |
| TinyPNG | Photo | 8.7MB | N/A | 925KB | 680.4KB | 31% | lossless |
| Crompressor | Banner | 113.5KB | N/A | N/A | 59.57KB | 54% | lossless |
| Crompressor | Photo | 8.7MB | N/A | 925KB | 964.62KB | ? | lossless |
| Kraken | Banner | 113.5KB | N/A | N/A | 76.71KB | 38.36% | lossless |
| Kraken | Photo | 8.7MB | N/A | 925KB | 888.86KB | 7.95 | lossless |
Our recommendations…
If you have made it this far then well done 😎
As you can see manually optimising your images will for standard banner images give better optimisation results and lower JPEG file sizes in the majority of cases.
The original large JPEG photo images will always be left out by plugins and manual tools due to the limits imposed. It can be a hit or miss.
Scaled images created by WordPress have similar results. It is really close between our no1 performers for both plugin and manual optimisation tools.
Having said that we always recommend that you manually use the no1 tool: DynamicDrive to optimise your JPEG images first.
Why? The human eye will always be the best judge of the quality of an image compared to an automated process.
Not only will using manual image optimisation tools give you the smallest file size but when you upload it to your site (and if its WordPress) you could also use a plugin to shave a few extra bytes off!
For those of you who have loads of images. Use the no1 plugin Short Pixel for existing images. For any new images manually optimise them with the DynamicDrive optimizer tool before using them on your site.
You will get the best of both worlds!
Final words…
This has been quite a long post. We wanted to give you all the data and details so you can make an informed choice of which tool to use. Plugin OR manual.
A final note. Modern browsers download images in parallel. So your focus and concentration should be spent on optimising images for your top landing 10 pages.
Lastly, let us know what you think. Have you used a tool that’s not mentioned with similar or better results? Do let us know by leaving a comment 😊